Digitising family albums
11 May 2014

A collection of learnings and recommendations derived from helping my family to digitise old photo albums.
In the end, our family albums amounted to about 2,500 photos across 15 or so albums (that’s not counting the photos in shoeboxes). I think my mum and dad had been pretty organised and disciplined about putting their favourites into albums. It was a bit of a wrench ripping the photos out, but I persuaded them to go for it because the prints were degenerating, fading and, well, they’ve been at the bottom of a drawer for quite a while. Digitising them has given them a new lease of life.
For me the fun parts were talking to mum and dad about the photos - which inevitably happens if you share a bottle of wine and then start ripping prints out of your family albums. And digitally flipping through the results is great, too.
The project took a lot longer than we expected, not because of the external scanning (which was one of the easiest bits). So I’ve collected some experiences from the process here. If anyone else learns from our mistakes or saves some time, so much the better!
Top tips
What follows is predicated on the idea that there are lots of photos, and is about scanning prints, not negatives or slides. I did get some negatives scanned and the results are excellent - certainly superior to prints. Getting all the prints scanned first made sense for us due to, er, organisational and financial considerations.
By “lots of photos”, I actually don’t mean very many. It’s not worth your while scanning more than 50 photos. Honestly.
- The hard bit is getting the photos out of the albums, organising them, getting them bundled up and packaged ready to send off.
- The next hardest part is organising the electronic files that come back, and getting them onto some device that’s actually pleasant for viewing photos. Like an iPad.
- Send your photos to Jeff Underwood at 1scan. I highly recommend the service. Label your photo bundles and ask for them to be scanned into folders with corresponding names.
Extracting prints from albums
Clear a big space to work in.
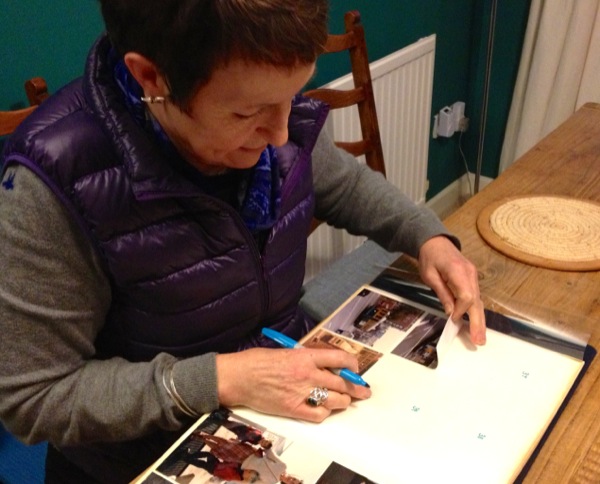
Label the back of each photo with a number and write the same number in the place it came from in the album. This helps in three ways:
- you can repopulate the albums at the end
- it’s easier to sort the photos into order (digitally), after they come back
- it simplifies the unmangling the piles of disorganised photos which you’ll inevitably create if you’re working on more than one album.
Use a different colour pen for each album in case you mix up photos.
When piling up extracted prints, make sure that the ink on the back of one print doesn’t smudge onto the image side of the next one. Sharpies take a little while to dry.
Packaging prints for posting
This is surprisingly difficult, especially if your photos are of varying sizes, because envelopes leave too much room and elastic bands tend to bend the largest photo in a pile. Elastic bands are good if all the photos in the pile are the same size. Whether you trust your photos to the Royal Mail is up to you. I did, and I always use Seajay’s postal calculator - so much easier to use than the official one. Bear in mind that Parcelforce often turn out cheaper than Royal Mail for parcels this size - ask at the Post Office counter.
Digital organisation
The filenames that come back will be sequential but it’s almost certain they won’t be in the same order as the album, or the order you sent them. I’m not sure but I think 1scan digitise the photos in batches by size. If this matters to you (it mattered to us), you need a way to copy and then rename the files that come back. The aim is to make sure that their alphabetical order is the same as their sequential order. I wrote a python script that was easy to assign to a keyboard shortcut, and then it was just a matter of selecting the photos in album order on screen.
iPhoto (and the built-in photo viewing software on iOS devices) seems a bit pernickety and inconsistent when it comes to displaying photos in alphabetical order. Sometimes it works, only to stop working after you sync to a device. This is annoying - and the solution is to adjust the metadata inside the jpegs. Use iPhoto’s menus View > Sort photos > by Title (assuming you’ve renamed as above), and then Photos > Batch change… > set the date of each photo to somewhere close to its true date, and allow iPhoto to add 1 minute between each photo’s timestamp. Then, all three orders are the same (desired/original album sequence, alphabetical and “date taken”).
Digital longevity
Make multiple copies (duh!). Make physical printouts. This seems weird, but it has a couple of benefits. For starters, when you know that the physical copy in your hand can be cheaply reproduced at will, you’re much less scared of damaging it, and you feel happier drinking a glass of red wine while flipping the pages. Longer term, if the owner(s) of the digital files die in an extreme ironing accident, physical copies might outlive digital, so more is better.
Finally, read about how I back up files, in case you’re as paranoid as I am.
Tags: photo, digital, recommendation
< Previous post | Next post >Favourite posts
- On wiggly lines and being normal
- On infinite villages
- Running a race backwards
- Brainmaking
- Their tables were stored full, to glad the sight
- The structure of a smell
Recent posts
Blog archives
Posts from 2012, 2013, 2014, 2015, 2016, 2017, 2018, 2019, 2020, 2021, 2022, 2023, 2024, 2025, 2026.