Feedback Loops
24 Sep 2020

The most popular post on my blog (at the moment) is a how-to post about locking a VW Passat without activating the alarm. It gets a respectable amount of traffic and I’m always pleased by a small drip feed of grateful messages I get through my contact form.
This post is another Volkswagen related how-to. Although I suspect it won’t generate the same traffic levels because it’s even more niche. Who knows.
The background story: our family were lucky enough to be able to buy a campervan late last year. We love our Volkswagen T6 conversion from Jerba campervans. Her name is Beyoncé.
We knew we’d like her before we bought her, because we had hired the exact same van earlier in the year for a trip to Northumberland. I definitely recommend trying a few different vans before you buy one, even though hiring them is expensive.
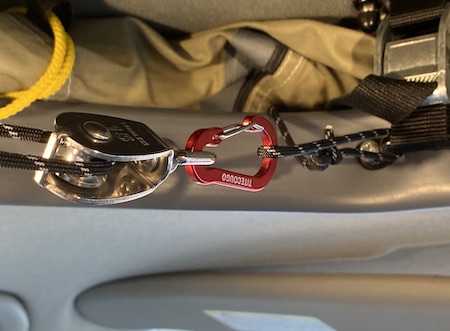
One thing we realised quite quickly while driving a long wheelbase van is that the passengers are a long way behind the “cockpit”. We have two rascals aged 5 and 7 and they like to grumble, squawk and generally kick off if they’re not regularly fed and watered. Passing fruit, oatcakes, crisps and other crumb-generating substances backwards while the van is on the road is effectively impossible. Right on our first go in the van we hatched the idea of a ceiling-mounted pulley system to facilitate this. So it was one of the first things we did when we got our own van.
Front/back pulley system
It’s quite hard to capture a photo of our pulley system, and indeed quite hard to capture a video, but here’s one that sort of demonstrates it. It’s filmed from the back seat and this is easy for a 7 year old child to do (they will do nearly anything for a biscuit).
We can unclip the pulley at the front and tuck it into the boot in about 10 seconds, then reinstall it ready to drive in about 20.
And here’s how to make your own if you like. Let me know if you do!
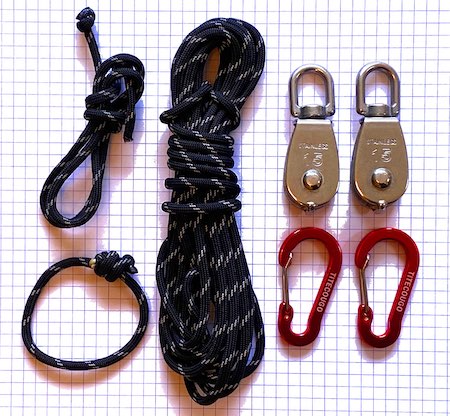
Materials
- 2 small pulleys
- 2 mini karabiners
- 4mm diameter paracord in lengths of:
- 25cm (rear)
- 390cm (main loop)
- 55cm (front)
When cutting paracord, it’s a good idea to singe/melt the ends like in this video: it stops it fraying.
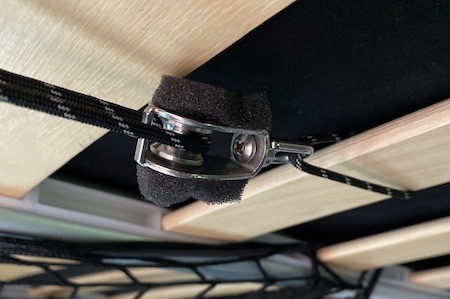
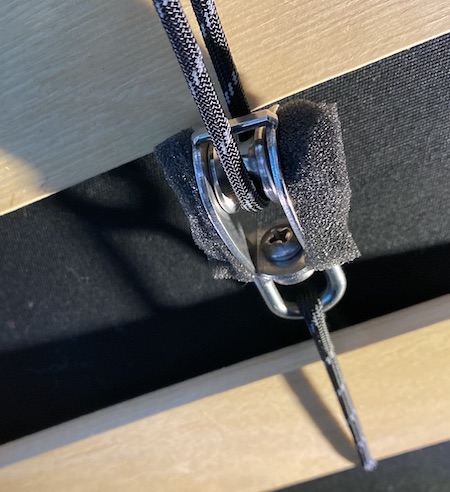
Instructions: 1. Rear
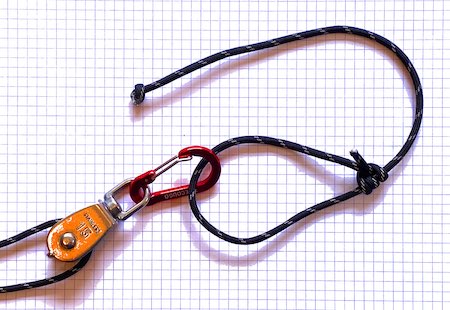
Loop the shortest piece of paracord through a ceiling slat, through the back loop of a pulley, and tie a Fisherman’s knot to hold it in place. Optional: we glued some foam on the side of our pulley to stop it making noise against the other slats on bumpy roads.
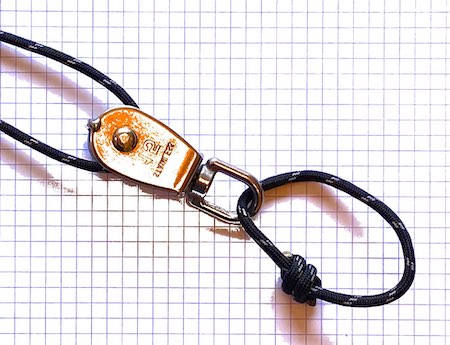
Instructions: 2. Main loop
Pass the long piece of cord over the rear pulley wheel and past another pulley wheel, forming a loop, and join the two ends with another Fisherman’s knot. The main karabiner goes through the middle of this. Enclose the lower part of the loop to avoid “droop” when moving heavier loads.
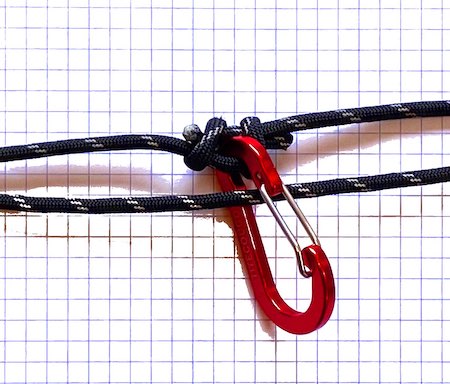
Instructions: 3. Front attachment
Attach the second karabiner through the front pulley’s loop and build an adjustable attachment with the 25cm piece of paracord by passing it through the metal fixing for the roof and tying a tautline hitch.
Tighten it up so the loop is horizontal but don’t over-tighten: it adds a load of friction into the system and grinds the pulleys. Attach and detach the system at the front when putting the roof up and down by loosening and opening the karabiner.
Happy pulleying!
< Previous post | Next post >Favourite posts
- On wiggly lines and being normal
- On infinite villages
- Running a race backwards
- Brainmaking
- Their tables were stored full, to glad the sight
- The structure of a smell
Recent posts
Blog archives
Posts from 2012, 2013, 2014, 2015, 2016, 2017, 2018, 2019, 2020, 2021, 2022, 2023, 2024, 2025, 2026.